Friday, 9 March 2012

My make up brush collection

Ok so I think I can safely say I am addicted to make up brushes! I don't know what it is about the feel of a new brush that gets me over excited but whatever it is it has left me with an ever growing brush collection but I can safely say that I enjoy using each and every one of them. I enjoy trying various brands of brushes because companies offer such a variety whether it be the hair itself (real or synthetic), the handle weight and design, the style and colour of the brushes and the uses that they have. My brushes range from very affordable to pretty darn expensive for a make up tool but I have never spent an excessive amount on brushes (despite being very tempted) and I have tried and own a variety of brands.


My full brush collection


My first full brush set - Sigma "make me classy" kit
I asked for this kit for my birthday a year ago and am so pleased with it. The quality is great and the brushes are very similar in style, texture and result to more expensive MAC brushes. The barrell container is great for travelling around with them but also for standing the brushes in on my make up desk in a neat and stylish way.
(www.cocktailcosmetics.co.uk £89.95)


The Sigma kit contains a good selection of eye.face and lip brushes, a perfect starter kit for make up artists or make up addicts!


I received this set of 16 Crown brushes on the first day of my make up course at London Muse so that we could practise on ourselves and one another and get used to owning and cleaning our own professional brush set. They come in a handy brush roll and are very compact so perfect for travel and were a great introduction to the many different types of brushes. I would recommend these for anyone on a budget who wants to try a variety of styles of brush.
(www.crownbrush.co.uk 16 Piece set £39.46)


All tucks away into a handy lightweight brush roll!


This basket is my every day use brushes. They are my personal collection and I would not use these brushes for a professional job because although I clean my brushes regularly I use most of these a lot on myself and many of them have been in my collection for a long time. There are various travel size brushes which I have received as part of limited edition gift sets or samples which I have been sent to try out for my blog. The main brands in this basket are Real Techniques, Japonesque, MAC and Ecotools, all of which I love and would highly recommend!


A couple of weeks ago I ordered two brushes from MAC and I am so glad that I did. I have wanted the 217 and 130 for so long now and finally took the plunge. The 217 is perfect for blending eyeshadows and the 130 is a dream for cream blush application and blending. I will be using these brushes in my professional kit because the results and quality are fantastic!


The newest additions to my collection are three brushes I bought at the Professional beauty show in London on monday. Crown brushes had a stall at the event with some great discounts on their products so it felt like the perfect chance to make a few affordable additions to my kit! I purchased the pro blending fluff brush (a MAC 217 dupe), the deluxe crease brush (similar to MAC 224) and a double ended domed foundation/concealer brush which has no name on the handle and I cannot find online but according to the associate who helped me it is a very new product and so might not be available yet on their site. I can't wait to try these brushes and see if they perform as well as their more expensive competitors. 

I am always on the look out for new brushes and brands to try so please leave comments below with your make up brush must haves so I can add them to my wish list!

x

Monday, 5 March 2012

15 minute smokey eye!


Since finishing my make up course last month I have spent a lot of time practising what I have learnt and pushing myself to create looks in short amounts of time as make up artists often have to work under pressure and to time constraints. I decided to test myself and see if I could create a half decent classic smokey eye in 15 minutes and then a bold red lip in 5 minutes. As a lot of you will know it is hard to perfect something in this amount of time as I myself could spend an hour on just my eyes, making sure everything is blended and adjusting the shape so that the symmetry is correct. However, a working make up artist does not have the luxury of time so I love pushing myself to work quicker and create a good look in less time. I applied my base, bronzer and blusher before getting started.

Here is my 15 minute smokey eye 


Firstly I used a paintpot by MAC in blackground all over the lid which is a cream consistency creating a dark eyelid straight away and giving the shadows something to cling onto. I love working with paintpots because they are quick and easy and immediately give you the colour pay off you need. This black colour has shimmer to it with an almost dark green tone to it and could even be worn alone. I didnt worry too much about being neat I simply applied it with my fingers all over the lid coming just above the socket line then blending with my MAC 217 brush. I applied some product under the waterline too.


I used my ELF 100 pc eyeshadow palette which at £7.50 was a total bargain and is perfect for those of you who want to play with colour and create looks without spending hundreds on high end shadows. 

I applied a shimmer black from the ELF palette on top of the paintpot all over the lid once again except for the inner corners. I pressed it on to get the best pigment and to help it adhere to the cream paintpot. Again I blended this with the 217 brush keeping it to a smokey soft shape but not worrying too much about being neat. The best smokey eyes are often the messiest! I also applied some shadow under the eye again below the waterline and blended slightly to give a rock chick look.

I used a shimmer silver grey on the inner corners of the eye using a pencil shape brush to get right into the corner and slightly above and below creating a wide eyed look and giving the smokey eye some variation in colour.

I used a black gel liner along the lashline to intensify the darkness and put lots of mascara on both top and bottom lashes. 

I patted on some ELF studio conditioning lip balm in Neutral to give a matte, nude lip finish. I usually like to wear smokey eyes with a nude lip, however......


I then decided to challenge myself to a 5 minute red lip!


I lined the lips using Illamasqua medium pencil in Fiesty, a gorgeous bright red. I always have a little trouble with lip liner especially in darker colours but I tried to work fast and precisely to create an even, symmetrical line! I then used Smooch cosmetics red lipstick (it has no name on the product) to fill in and define the lips. I used a bit of concealer to tidy up around the edges however I ran out of time whilst correcting the cupids bow so it was not a perfect red lip!

Overall, I am quite pleased with how I did considering the time limit and doing exercises like this and documenting the results inspires me to be better the next time! 

x

Thursday, 1 March 2012

Sophie i technique - iconic i

Illamasqua recently launched some new SOPHIE products and with it an online competition to create your own version of the sophie i technique smokey eye. This technique is explained on their site with a step my step guide to producing this creative smokey eye look. I am a supporter of this collection because of what it stands for in the fight against prejudice and bullying which was explained in one my previous blog posts. Illamasqua collections are always exciting and I hope to purchase some of the SOPHIE products when I next get paid. In the mean time i decided to put my creative skills to the test and enter their competition to win £100 worth of products and upload my version of the iconic i.


The step by step guide on how to create the SOPHIE i


For this look I wanted to create a smokey eye with a twist by using oranges and reds with the dark black and I feel it gives it a modern, almost futuristic look.

Here is how I created it in 10 steps:

1. I applied Chanel Vitalumiere aqua all over the skin to create a dewy but medium coverage base. I made sure to apply foundation to the eyelids which would act as a primer for the eyeshadows and counteract any discolouration on my eyelids.

2. I didn't have a black kohl eyeliner to hand so I used black eyeshadow to create the line from the outer corner of the eye through the socket line. This line gave me my initial shape but would be much more intense and easier to follow if using a black pencil. I blended it slightly but not too much so as not to lose too much intensity of colour or shape.

3. I applied a light orange colour all over the lid and blended using a mac 217 brush. I didn't go above the socket line as this is where the black line would be created.

4. I applied a red colour to the middle and outer corners of the lid, blending it into the orange at the meet so that the colours seemed to change seamlessly. I used the same 217 brush to blend.

5. I applied more of the black eyeshadow to the outer corner to intensify and create the winged smokey eye effect. I decided to create a long upturned wing because then I could use more colour on the lid and make the look more dramatic.

6. I used a black gel eyeliner along the lash line to make the eyes look darker and make lashes look thicker.

7. I used lots of mascara to thicken and lengthen lashes on both top and bottom lashes. 

8. I used concealer to tidy up under and around the eye. I used a sponge to make the outer corners of the eye more defined. I also put concealer under the brow to lift and define the shape of the smokey eye.

9. I added some bronzer to contour under the cheekbones. I made the contouring quite strong as this look would suit catwalk or editorial where the cheekbones could be made more prominent and highlights using light and dark shades on the face.

10. I added an orange/red lipstick to compliment the eye colours and make the look even more creative and dramatic without overpowering the smokey eyes.

The products I used:

Foundation - Chanel vitalumiere aqua
Concealer - Collection 2000 lasting perfection
Bronzer - Benefit Hoola
Eyeshadows - ELF 100 pc palette (orange and red) Sleek storm palette (black)
Mascara - Bourjois Volumizer
Eyeliner - Maybelline gel liner


The colours used are definitely not your traditional smokey eye, however I tried to follow the SOPHIE i technique to some extent whilst giving it my own creative twist! I love playing around with colours and even though I have used oranges and reds I still think this look is quite wearable and if your looking for something a little different for a night out this would look amazing with a black outfit and statement jewellery!

x

Tuesday, 28 February 2012

Chanel Perfection Lumiere

I received a sample of this foundation in a magazine and was so excited as I am a Chanel foundation junkie! I have loved every foundation they have ever brought out and my all time favourite Chanel vitalumiere aqua is my current everyday base of choice. I love the vitalumiere aqua because it is light, dewy but buildable and therefore takes me perfectly from daytime to evening make up looks. I had high hopes for perfection lumiere and as much as I wanted to dislike a foundation that costs £36 I am sorry to say that once again Chanel have created an amazing product. 


Perfection lumiere on the skin 

The texture is not quite as light as the Aqua however it is certainly not thick or heavy on the skin but provides much more coverage and a much more matte finish. I am a lover of dewy skin and so was a little worried that I wouldn't get on with the matte finish however it still retains a sense of radiance whilst mattifying oily areas. I have normal/combination skin so I am lucky that most foundation finishes suit me however a drier skin type may find the finish would sit on the skin and perhaps make it look even drier. Oily skin types should enjoy the mattifying effect and for me it has the perfect finish for an evening look. 

I personally would not wear this in the day time because it almost looks too flawless! I prefer a lighter look for the day where the natural skin tones can be seen coming through however for those who prefer heavier coverage or have problem skin this would be a fantastic option. Many people have complained about the strong smell of the foundations, stating that it is too highly fragranced however as Chanel foundation wearer it is not strong to me and I actually find that it smells luxurious and makes the entire experience a pleasurable one!


Perfection lumiere as base with other products to finish the look

I never thought I would be the kind of girl to spend over £30 on a foundation as I used to be a drugstore girl through and through however as I learn more about make up I appreciate the importance of a good quality foundation and brush to apply it with. I applied this foundation with my Real Techniques stippling brush and I loved the finished effect. I will be buying this foundation despite my best efforts to hate it because of the high price! For me it creates the perfect flawless finish and therefore I cannot resist making that purchase!

Have you tried this foundation yet and what did you think? 

x

Monday, 27 February 2012

100 follower MAC giveaway!

Ok so this is a little overdue thanks to major problems with my internet however it is fixed and I am so excited about doing my first giveaway! I am doing this giveaway to say thank you to everyone who reads or followers my blog because without you I would be rambling on to myself about beauty products or having to bore my friends and family with my thoughts! 

I recently won a giveaway by Laura from http://laurzrah.blogspot.com/ which was a MAC lipstick giveaway where followers could choose the shade of their choice and then they would receive their ideal colour! I chose "Girl about Town", a bright pink which I would never normally wear and had such fun looking through the shades on the website that I have decided that this is the perfect prize for my first giveaway! Laura also sent me some extra goodies too including hand cream and lip balm :)


My gorgeous MAC lipstick prize!

So here are the rules for my 100 follower MAC giveaway:

1. You must follow my blog via GFC to enter

2. Please leave a comment below this post with your email and your chosen lipstick shade (You must leave both to be entered) Go onto www.maccosmetics.co.uk and lipsticks section to pick your favourite!

3. I will be putting the names into a hat (old school method but as a giveaway virgin it is the easiest and fairest way I can pick the winner)

4. Everyone will get ONE entry only however do feel free to tweet about the giveaway :)

5. The winner will be picked in 3 weeks time (19th March 2012) to give everyone a chance to enter

6. The lipstick will be bought after the winner is chosen to make sure I buy your personal favourite shade. I will email the winner and confirm their chosen shade. If the colour is unavailable a second choice may have to be made however MAC lipsticks are usually readily available in all shades.

Please note that this giveaway is for UK residents only - sorry!

THANK YOU EVERYONE AND GOOD LUCK!

x

Wednesday, 22 February 2012

FOTD - London fashion week

Hey everyone! I thought I would show you what I wore to the LFW show on Saturday. I was keen to look my best as it is an event showcasing the best in hair, make up and fashion so I took a while to decide what style to go for but I decided in the end to wear something comfortable, girly with a trend led twist!


Playsuit: Miss Selfridge petite
Necklace: Topshop


Foundation: Mix of Chanel Pro Lumiere and Chanel Vitalumiere Aqua
Concealer: Collection 2000 lasting perfection
Bronzer: Chanel Soleil de tan 
Blusher: VIVO Baked blusher
Highlighter: MAC Strobe cream
Mascara: Bourjois Volumizer
Eyeliner: Maybelline gel liner
Lipliner: Illamasqua Maniac
Lipstick: MAC Girl About Town


I wanted to keep the eyes simple whilst wearing this bright pink lipstick so a flick of gel liner along the lash line was enough to darken the eyes without doing a full smokey eye look! I adore this new lipstick which I won in a giveaway from Laura of http://laurzrah.blogspot.com/ to win a MAC lipstick of your choice and I am so glad I picked this stunning colour! I would never have worn this bright shade a few years ago but I am trying to be more experimental with my make up choices so this is the perfect colour to encourage me to wear more vibrant colours!

x

Tuesday, 21 February 2012

Illamasqua pop up sale haul


On 12th February I was invited to a pop up sale at Illamasqua by Alex, a London Muse graduate who works there as a part time make up artist. Myself and a few of the other Muse graduates and some aspiring make up friends of mine decided to meet early and prepared ourselves for a long queue at the door. However when we arrived at the store on Beak Street at 11 we were shocked to find that we were some of the first people there and pretty much had the store to ourselves for an hour! 

The staff were extremely helpful and the products themselves had incredible discounts on them! Overall I spent £160 and a good few hours in the store but the savings I made were about £400! Here is what I bought that day:


Two full bags! I love the design on them as they instantly feel luxurious!


My collection of goodies!


Rich Liquid foundation in lightest, my shade and darkest - great variety of tones and only £75 for 14 shades


Rich liquid foundation blended in - the texture is very similar to mac face and body and must be shaken first. It glided on smoothly and left a light dewy finish with buildable coverage. Would be perfect for bridal, sheer to medium skin finishes and hydrating for dry skin too! 


Love the packaging as always!


Cream foundation - medium to full coverage with handy mirror and sponge if buying for personal use. Only £45 for 8 shades


A medium shade of the cream foundation


Cream foundation blended into skin - The coverage would be great for problem skin, oily skin types and great on photographic shoots. Could settle into fine lines or dry skin so would be cautious of this but fantastic coverage and a lovely texture to work with!


Cream foundation tower!


Onto my colourful buys...


Eyeshadows, concealer, blush, pigments - All £5 each!


Concealer in CC200, cream shadow in Crumble, cream shadow in Debauch and cream blusher in Sob


Powder shadow in Vision, liquid metal shadow in Surge and Pure pigment in Breathe


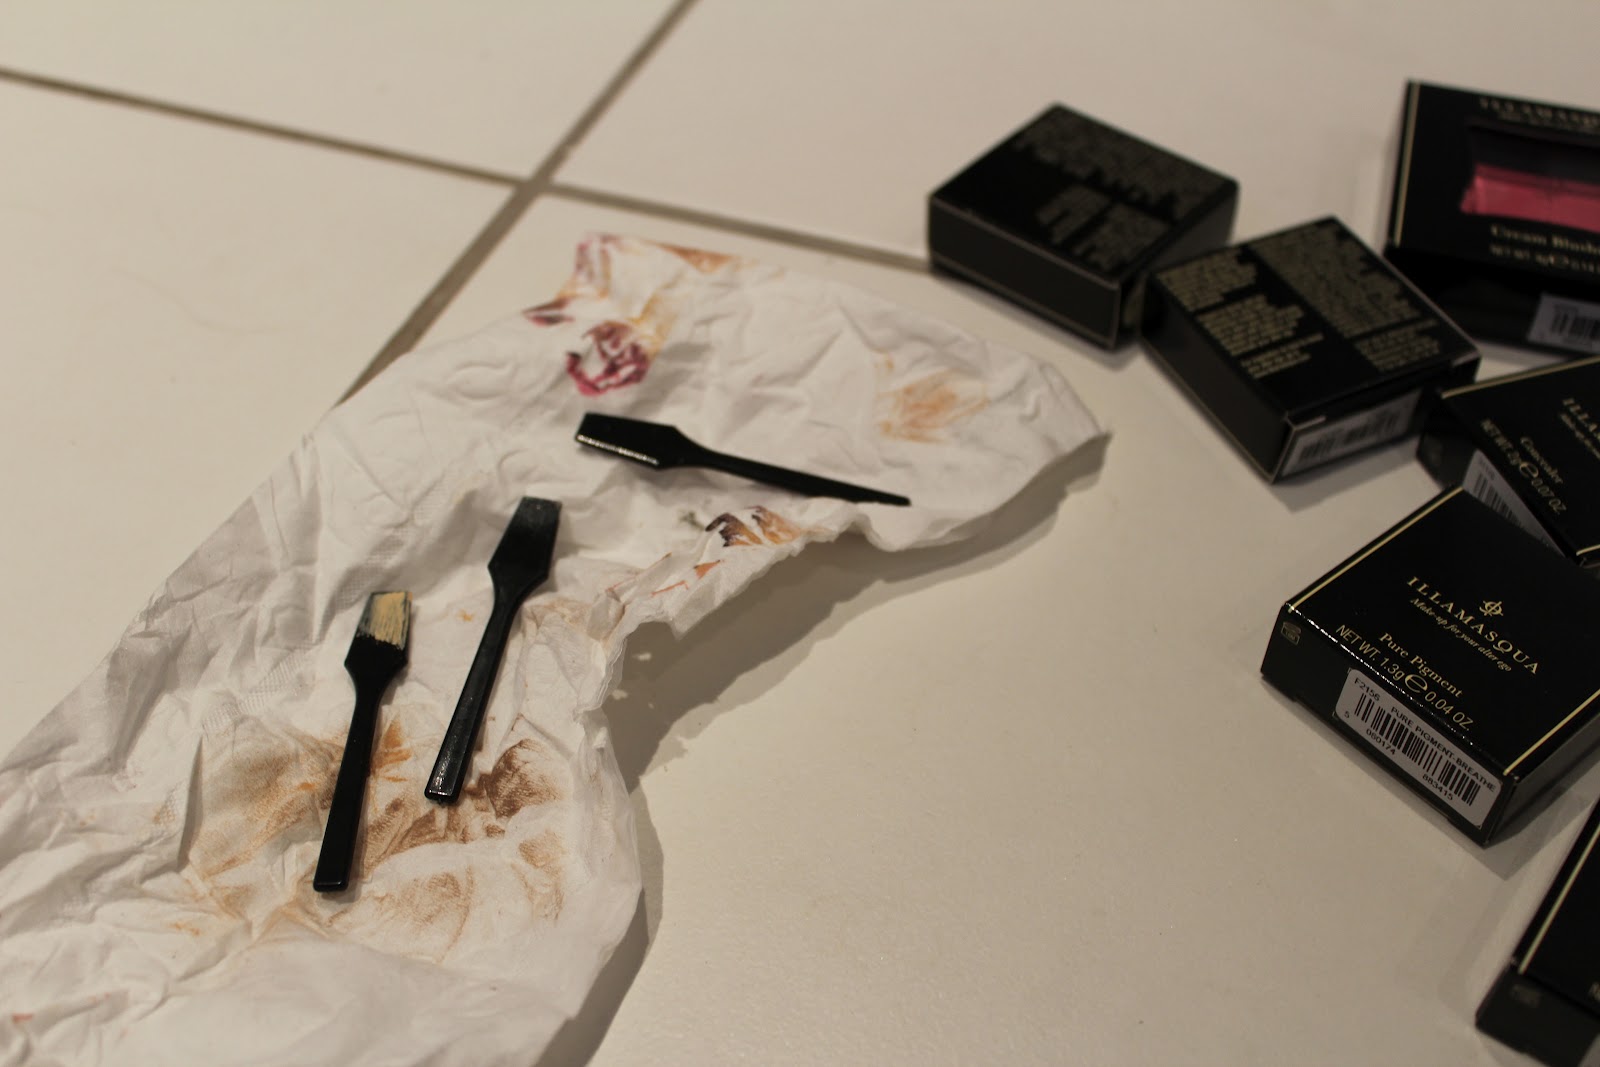
Using spatulas for swatching because I will be adding these products to my professional kit! Make up artists not adhering to Safe beauty is my pet peeve!


Lip products including two pencils and a gloss - £2 for pencils and £5 for gloss!


Medium pencil in Maniac (top), medium pencil in Fiesty (bottom) and intense lipgloss in Femme 

I love each and every one of these products and picked them carefully during the sale or else I would have chucked every reduced item into my basket and spent hundreds! I tried to think realistically about products that I might want or need in my professional kit but also might keep a few for myself (the intense lipgloss in particular is stunning and I might accidentally pop it into my make up bag). I am so impressed with the quality of the products. I have never bought many items from Illamasqua as I was a little too devoted to MAC products but this sale has taught me that Illamasqua that truly excels in every aspect of the make up industry. Every product I tried was luxurious on the skin and contained pigment of colour which actually blew me away! I am hoping to create many looks with these products and know that the colours and textures will inspire me to try and be as creative as the brand itself.

x